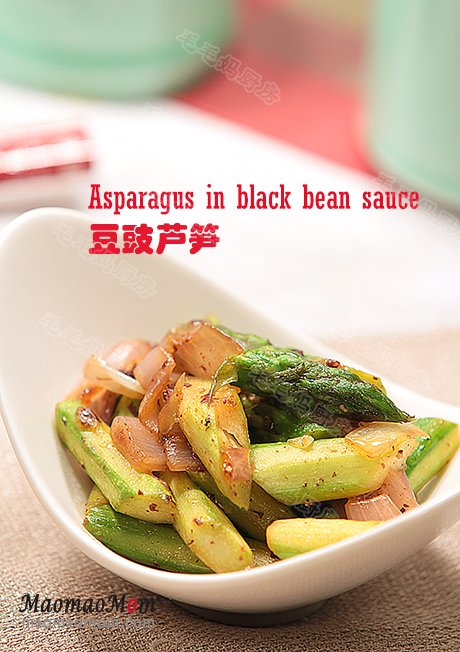
【AirGo之豆豉芦笋】
MaomaoMom/毛毛妈
用爱锅AirGo做了豆豉芦笋,芦笋嫩嫩很好吃. 且轻松便捷无油烟。想购买点AirGo爱锅,用 maomao25 优惠券有for $25 折扣。

用料:
1:芦笋半包500克
2:红葱头3个(140克);
3:牛油果油 1大匙,豆豉酱1大匙;
4:黑胡椒1/6茶匙,盐1/4茶匙 (如果豆豉酱比较咸就不加盐),头抽酱油1大匙, 鸡粉 1/6茶匙;
5:香油1茶匙。
注:1大匙Tablespoon =15毫升,1茶匙Teaspoon =5毫升,1杯Cup=240毫升。
做法
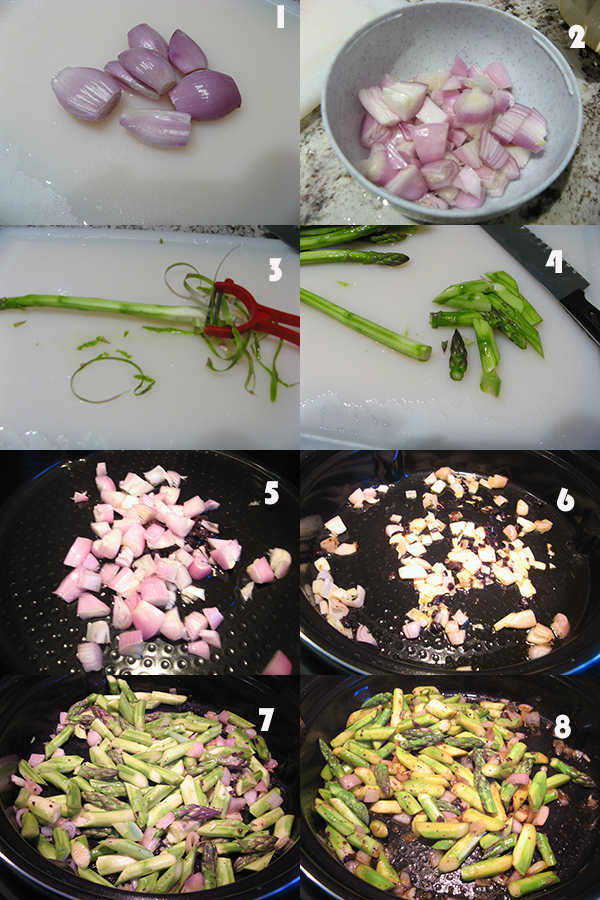
1、红葱头剥去皮,冲洗后(图1)切小丁(图2)。芦笋用刨刀削去外皮(图3),水冲洗后滚刀切寸段备用(图4)。
2、【AirGo】插上电源,用“Function”选“Air Fryer”然后选择415F及6分钟,点“Start”预热。放入1大匙油,豆豉煎1大匙和切碎的红葱头丁(图5), 盖上盖让程序继续。

3、等程序进行了1-2分钟,打开盖子搅拌几下(图6),放入芦笋, 盐及黑胡椒粉, 搅拌几下 (图7), 盖上盖继续。
4、程序进行到还有2分钟后或提醒翻转时,打开盖子,放入1大匙头抽酱油及鸡粉拌匀(图8),盖上盖继续, 让程序完成。
5、等程序完成,打开盖子, 放1茶匙香油, 搅拌几下就可以盛出来上桌。


I do accept as true with all the concepts you’ve introduced in your post. They are very convincing and will definitely work. Still, the posts are very short for newbies. May just you please extend them a little from next time? Thanks for the post.
Very interesting topic, thanks for posting.
It’s actually a cool and useful piece of info. I’m glad that you shared this useful information with us. Please keep us informed like this. Thanks for sharing.
Excellent post. I was checking continuously this blog and I’m impressed! Very helpful information specially the last part 🙂 I care for such information a lot. I was seeking this particular info for a very long time. Thank you and good luck.