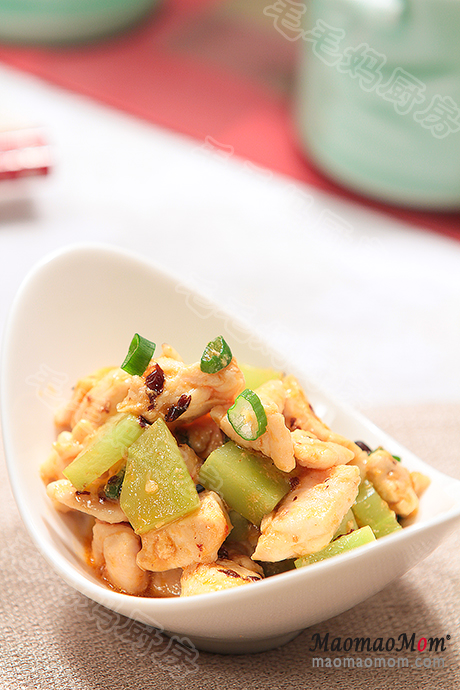
【AirGo-莴笋鸡丁】
MaomaoMom/毛毛妈
用爱锅AirGo做了莴笋鸡丁, 鸡肉嫩滑莴笋脆脆, 好滋味, 且轻松便捷无油烟。想购买点AirGo爱锅,用 maomao25 优惠券有for $25 折扣。

用料:
1: 有机鸡胸肉2块520克, 盐1/2 茶匙, 生粉1茶匙;
2: 莴笋一条(380克);
3: 牛油果油 1.5大匙, 葱花1大匙, 蒜蓉2茶匙, 李锦记豆豉辣椒酱1大匙;
4: 头抽酱油1.5大匙,鸡粉1/4茶匙,盐1/4茶匙;
5: 香油 1茶匙.
注:1大匙Tablespoon =15毫升,1茶匙Teaspoon =5毫升,1杯Cup=240毫升。
做法
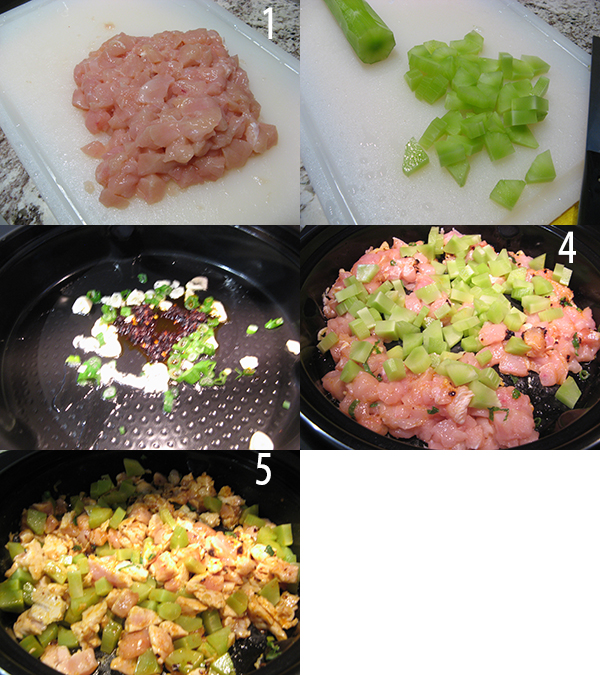
1、鸡胸肉洗净沥水后切1厘米大小丁 (图1). 用手抓捏1分钟放盐1/2茶匙及生粉1茶匙拌匀. 莴笋削去皮水冲洗, 也切小丁(图2),待用.
2、【AirGo】插上电源,用“Function”选“Air Fryer”然后选择420F及7分钟,点“Start”预热。预热后放入1.5大匙油,葱花, 蒜蓉, 及豆豉辣椒酱(图3), 炒几下盖上盖让程序继续。.
3、等程序进行了1分钟,打开盖子, 放入鸡丁及莴笋丁 (图5), 搅拌几下, 盖上盖继续。

4、程序进行到还有2分钟后或提醒翻转时,打开盖子,所有4料搅拌均匀(图5),盖上盖, 让程序完成。
5、等程序完成,打开盖子, 放1茶匙香油, 翻炒均匀, 即可盛出上桌了。


Having read this I thought it was very informative. I appreciate you taking the time and effort to put this article together. I once again find myself spending way to much time both reading and commenting. But so what, it was still worth it!
Howdy this is somewhat of off topic but I was wanting to know if blogs use WYSIWYG editors or if you have to manually code with HTML. I’m starting a blog soon but have no coding expertise so I wanted to get guidance from someone with experience. Any help would be enormously appreciated!
I have learn a few excellent stuff here. Definitely worth bookmarking for revisiting. I surprise how much effort you set to create this sort of wonderful informative web site.
magnificent post, very informative. I wonder why the other specialists of this sector do not notice this. You must continue your writing. I’m sure, you’ve a great readers’ base already!