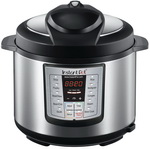
时间过的真快,毛毛妈厨房转为双语网站,转眼已经快一周年了。为感谢大家一直的支持与鼓励,6月9日礼拜天下午2点开始,将推出我最喜欢的快煲电压力锅作为双语网站一周年抽奖的奖品,请网亲们关注。
【蓝莓酥】
by 毛毛妈
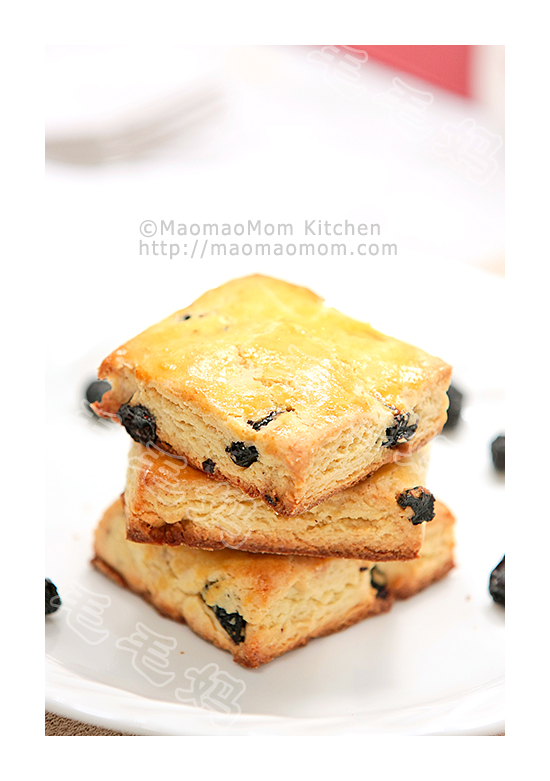
受君之的葡萄奶酥启发,做了这个蓝莓酥,挺不错。
1:牛油1/3杯+1大匙(90克)室温软化,糖1/3杯(78克),奶粉2大匙(13克);
2:大号鸡蛋的蛋黄2.5个,香草香精 1茶匙;
3:低筋面粉(cake & pastry flour)1.5杯(180克),泡打粉1/2茶匙;
4:蓝莓干1/2杯(80克);
5:水1-2茶匙;
6:半个蛋黄,水1/2茶匙,拌匀。
注:1大匙Tablespoon=15毫升,1茶匙Teaspoon=5毫升,1杯Cup=240毫升。
做法:
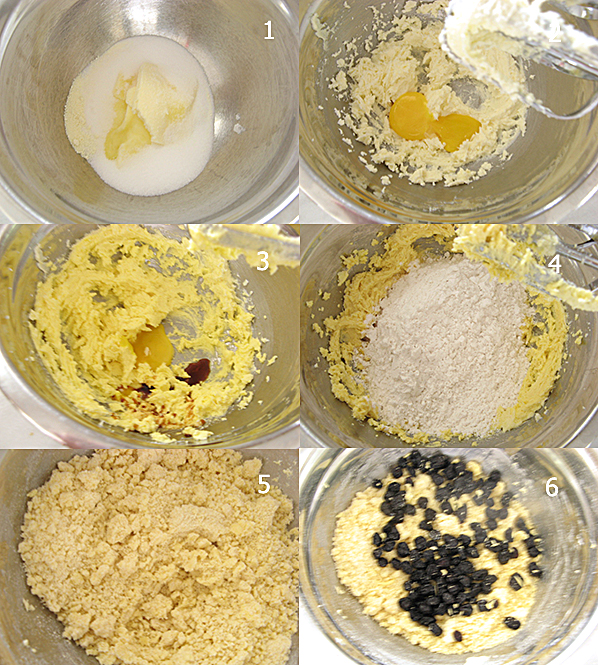
1、预热烤箱355F/180摄氏度。将1料放入一盆里(图1),用打蛋器(handheld mixer)高速打2-3分钟到蓬松。放入一个蛋黄(图2),低速打匀。再放一个蛋黄低速打匀。最后放剩下的半个蛋黄和1茶匙香草香精(图3),低速打匀。
2、将3料的面粉和泡打粉充分混合均匀后,倒入打发的蛋黄里(图4),中速打匀(图5)。再加入蓝莓干(图6)拌匀,揉成软面团,如果比较干,可适当加1-2茶匙水,面团不要过度揉。
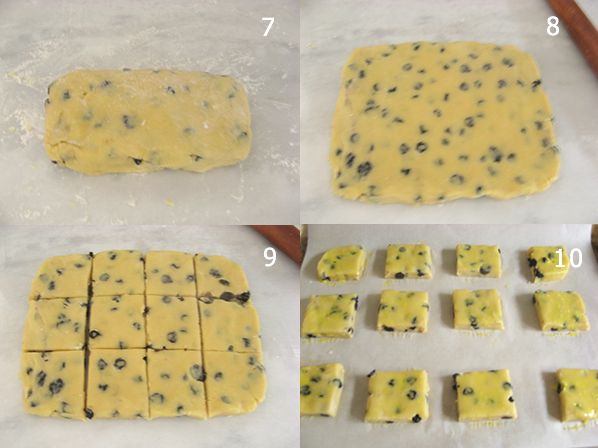
3、将面团在案板上揉成一长条后压扁(图7),擀开成20 x 16厘米的面片(图8),切12等份(图9)。
4、放到铺了烤盘纸的烤盘里,刷上6料的蛋液(图10),放入预热至355F/180摄氏的烤箱内,烤15分钟左右至表面金黄色拿出。
5、酥饼烤好后,放架子上冷凉后食用。



Great post. I am facing a couple of these problems.
Admiring the dedication you put into your site and in depth information you offer. It’s awesome to come across a blog every once in a while that isn’t the same unwanted rehashed information. Great read! I’ve bookmarked your site and I’m adding your RSS feeds to my Google account.
I am impressed with this web site, really I am a big fan .
It is the best time to make some plans for the future and it is time to be happy. I have read this post and if I could I wish to suggest you some interesting things or suggestions. Maybe you could write next articles referring to this article. I want to read even more things about it!