【AirGo之豆腐烘蛋】
MaomaoMom/毛毛妈
这个豆腐烘蛋, 简单食材, 绝对好吃. 爱锅AirGo做豆腐不会水哒哒,鲜嫩可口,且轻松便捷无油烟。想购买点AirGo爱锅,用 maomao25 优惠券有for $25 折扣。
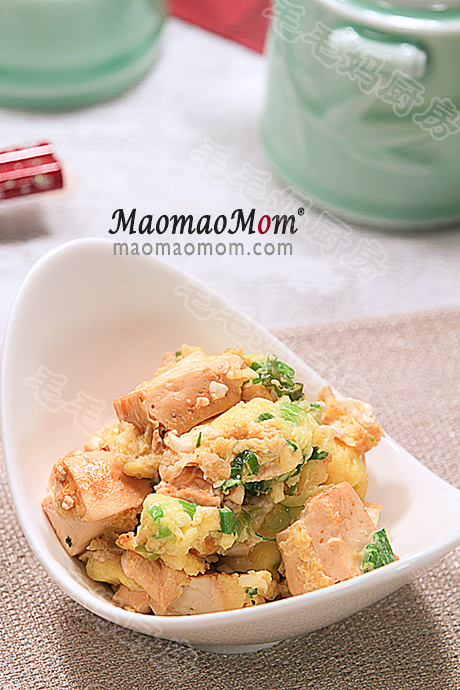
用料:
1:老豆腐3块525克;
2:牛油果油 1.5大匙,葱花1大匙;
3:盐1/3茶匙,黑胡椒粉1/6茶匙;
4:大鸡蛋3个, 葱花3大匙, 盐1/3茶匙, 鸡粉1/6茶匙;
5:头抽酱油1大匙;
6:香油1茶匙。
注:1大匙Tablespoon =15毫升,1茶匙Teaspoon =5毫升,1杯Cup=240毫升。
具体做法看视频(真喜爱请在Youtube 或它app里面观看, 收藏点赞! 谢谢):
2、【AirGo】插上电源,用“Function”选“Air Fryer”然后选择420F及14分钟,点“Start”预热。预热后放入1.5大匙油,葱花1大匙,放入豆腐块, 黑胡椒1/6茶匙及1/3盐拌匀(图3),盖上盖让程序继续。
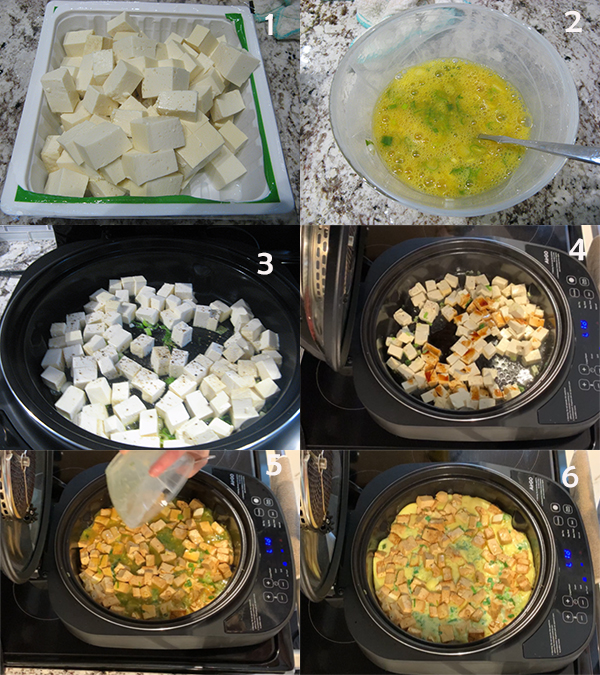
3、 程序进行到5分钟后,打开盖子,放入3料搅拌几下(图4),盖上盖继续。
4、 程序进行到还有4-5分钟后或提醒翻转时,打开盖子,放入鸡蛋液(图5),盖上盖继续, 让程序完成。
5、等程序完成,打开盖子(图6), 加1茶匙香油, 搅拌几下就可以盛出来上桌,配点米饭吃很棒。



I have recently started a site, the information you provide on this web site has helped me tremendously. Thank you for all of your time & work.
Good day! This is my first comment here so I just wanted to give a quick shout out and say I really enjoy reading your articles. Can you recommend any other blogs/websites/forums that go over the same topics? Thank you so much!
This is a very good tips especially to those new to blogosphere, brief and accurate information… Thanks for sharing this one. A must read article.
A powerful share, I simply given this onto a colleague who was doing a bit evaluation on this. And he in truth bought me breakfast as a result of I found it for him.. smile. So let me reword that: Thnx for the treat! But yeah Thnkx for spending the time to debate this, I feel strongly about it and love studying more on this topic. If possible, as you turn out to be expertise, would you mind updating your blog with more particulars? It’s extremely useful for me. Big thumb up for this weblog post!