【AirGo之豆豉芦笋】
MaomaoMom/毛毛妈
用爱锅AirGo做了豆豉芦笋,芦笋嫩嫩很好吃. 且轻松便捷无油烟。想购买点AirGo爱锅,用 maomao25 优惠券有for $25 折扣。
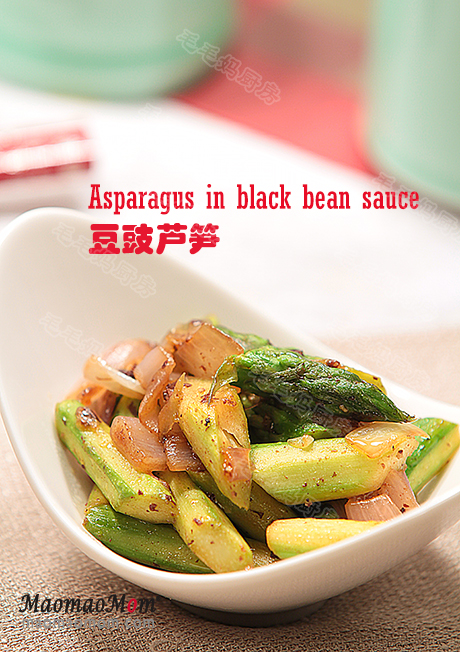
用料:
1:芦笋半包500克
2:红葱头3个(140克);
3:牛油果油 1大匙,豆豉酱1大匙;
4:黑胡椒1/6茶匙,盐1/4茶匙 (如果豆豉酱比较咸就不加盐),头抽酱油1大匙, 鸡粉 1/6茶匙;
5:香油1茶匙。
注:1大匙Tablespoon =15毫升,1茶匙Teaspoon =5毫升,1杯Cup=240毫升。
做法
1、红葱头剥去皮,冲洗后(图1)切小丁(图2)。芦笋用刨刀削去外皮(图3),水冲洗后滚刀切寸段备用(图4)。
2、【AirGo】插上电源,用“Function”选“Air Fryer”然后选择415F及6分钟,点“Start”预热。放入1大匙油,豆豉煎1大匙和切碎的红葱头丁(图5), 盖上盖让程序继续。
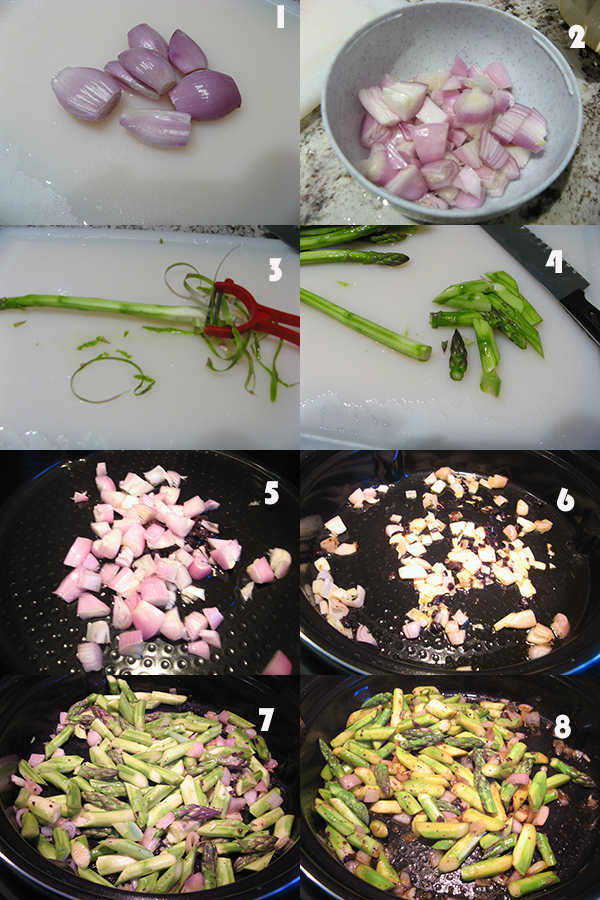
3、等程序进行了1-2分钟,打开盖子搅拌几下(图6),放入芦笋, 盐及黑胡椒粉, 搅拌几下 (图7), 盖上盖继续。
4、程序进行到还有2分钟后或提醒翻转时,打开盖子,放入1大匙头抽酱油及鸡粉拌匀(图8),盖上盖继续, 让程序完成。
5、等程序完成,打开盖子, 放1茶匙香油, 搅拌几下就可以盛出来上桌。



I just couldn’t leave your site before suggesting that I really loved the standard info a person supply to your guests? Is gonna be back ceaselessly to inspect new posts
Simply wanna comment on few general things, The website design is perfect, the subject material is really good : D.
you’re really a good webmaster. The site loading speed is incredible. It seems that you’re doing any unique trick. Also, The contents are masterwork. you’ve done a excellent job on this topic!
Interesting blog! Is your theme custom made or did you download it from somewhere? A theme like yours with a few simple adjustements would really make my blog shine. Please let me know where you got your theme. With thanks