【AirGo-芦笋蛋挞】
MaomaoMom/毛毛妈
我用买来的千层蛋挞皮,非常不错. 非常喜欢爱锅AirGo的烤箱功能, 用它烤不仅时间比大烤箱少, 酥皮真是更酥, 一口咬下蛋液嫩滑芦笋片脆嫩, 好滋味. 用爱锅轻松便捷无油烟, 夏天也不会厨房弄的热。想购买点AirGo爱锅,用 maomao25 优惠券有for $25 折扣。
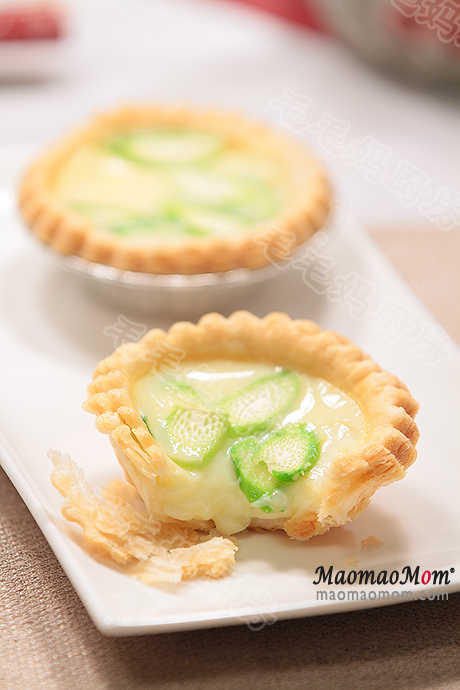
用料:
1: 9个中号蛋挞皮,如果买不到千层酥皮蛋挞皮,可以参考 紫薯蛋挞里的方子自己做;
2: 粗芦笋2根(35克);
3: 鸡蛋1个;
4: 开水1/2杯(120克);
5: 鸡粉1/4茶匙, 盐1/3茶匙.
注:1大匙Tablespoon =15毫升,1茶匙Teaspoon =5毫升,1杯Cup=240毫升。以上的材料可以做9个中号蛋挞。
做法:
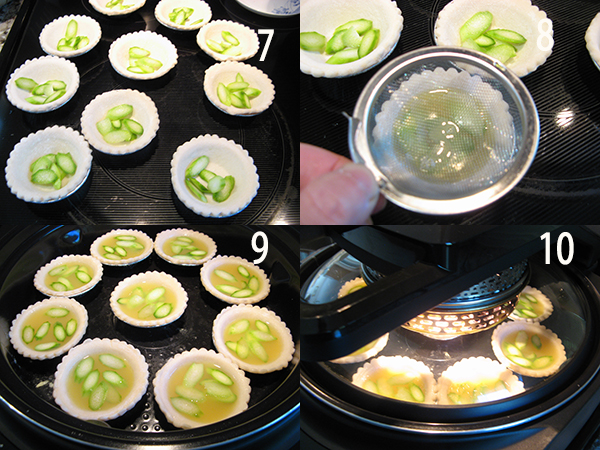
1、芦笋用刨刀削去外皮 (图1), 水冲洗后切1.5毫米片备用 (图2). 将4-5料放入一杯中, 搅拌均匀(图3). 鸡蛋一个(图4)打散, 边搅拌边把蛋液倒入水中(图5)搅拌均匀(图6).

2、将6-7片芦笋片放入蛋挞里 (图7), 然后将奶液通过细筛(图8) 均匀注入9个蛋挞皮中(图9), 只要8分满的样子, 多余的蛋液不要.
3、【AirGo】插上电源,用“Function”选“Oven”然后选择420F及15分钟,点“Start”预热。预热后放入, 打开盖子, 快速将蛋挞放入锅里, 注意不要烫到自己, 盖上盖子让程序继续(图10).
4、程序结束, 打开盖子, 用铲子把蛋挞铲出来, 稍冷即可食用, 太好吃了.



I do agree with all the ideas you’ve presented in your post. They’re really convincing and will definitely work. Still, the posts are too short for beginners. Could you please extend them a bit from next time? Thanks for the post.
Thanks for every other fantastic post. Where else may just anyone get that kind of info in such a perfect means of writing? I’ve a presentation subsequent week, and I am at the look for such information.
It is really a great and helpful piece of info. I am glad that you shared this helpful info with us. Please keep us informed like this. Thanks for sharing.
I liked as much as you’ll obtain carried out proper here. The sketch is tasteful, your authored material stylish. nevertheless, you command get got an impatience over that you want be delivering the following. ill definitely come more formerly again as exactly the similar nearly very often inside of case you protect this increase.