【玫瑰酱酥饼】
by 毛毛妈
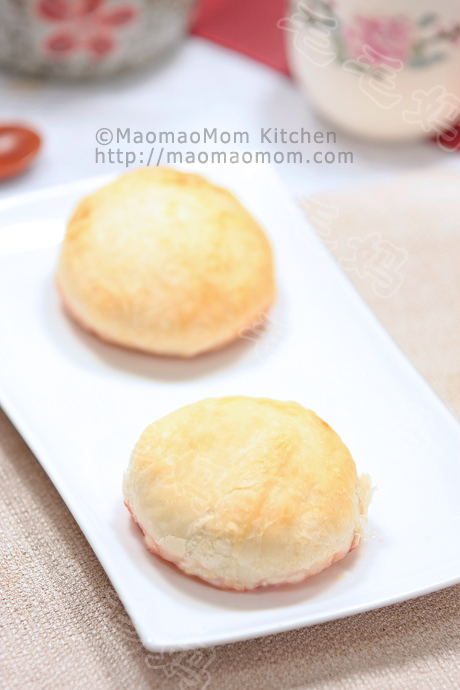
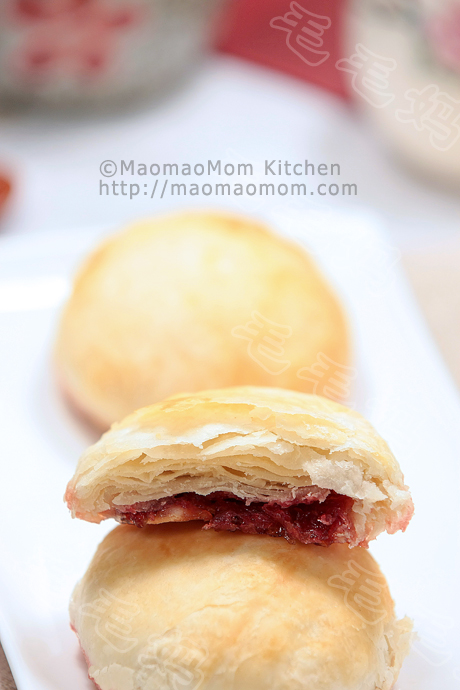
家里还有从国内买的玫瑰酱挺香的。做了这个玫瑰酱酥饼,用的是素油,起酥也很好。
水皮:
1:中筋面粉1杯(All purpose flour,160克),糖1.5大匙(20克);
2:玉米油3大匙(40克),水1/3杯+1大匙(95克);
油皮:
3:低筋面粉(Cake and pastry flour)1/2杯+3大匙(97克),玉米油4大匙(53克);
其他:
4:糖玫瑰12×1茶匙;
注:1大匙=15毫升=1 Tbsp,1茶匙=5毫升=1 Tsp,1杯=240毫升。以上材料可以做12个玫瑰酱酥饼。
做法:
1、水皮:将1料里的面粉和糖放入盆里拌匀,然后倒入2料(图1),合成软面团(图2),然后保湿静置20分钟。
2、油皮:将3料里的面粉和油,放一干净盆里(图3),用小勺拌匀,成软面待用(图4)。

3、将水皮和油皮各分割成12等份揉圆。将水皮擀成圆形薄饼,放上一粒油皮球(图5)。慢慢收拢包裹住油皮球,封口朝下(图6)。依次做好剩余11份。
4、做的过程注意其他的要盖上保鲜膜保湿。包好的水油皮压扁,擀成长长椭圆形(图7),从底部往上卷成筒(图8)。依次做好所有水油皮。盖上保鲜膜静置10分钟。
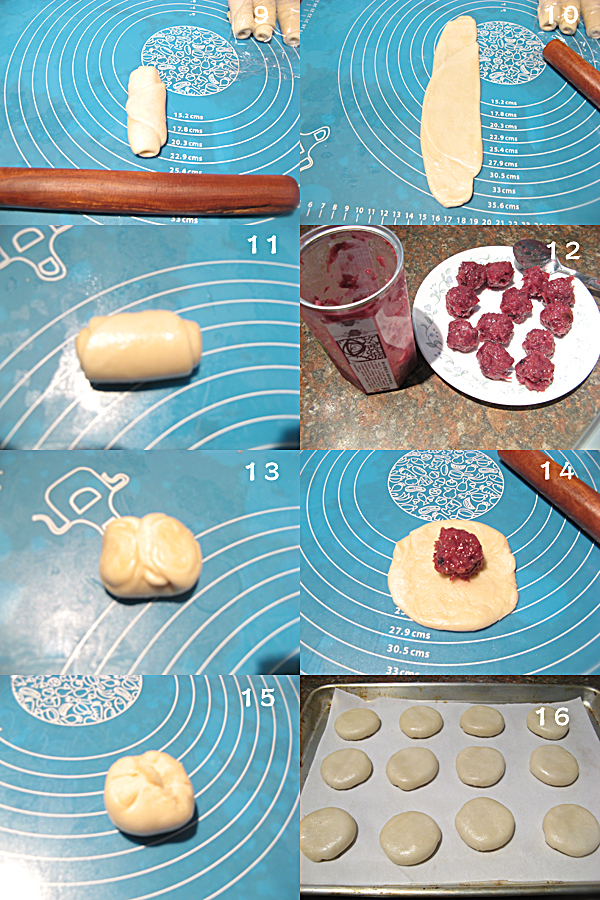
5、收口朝上将(图9),擀成椭圆形(图10),再从底部往上卷成筒(图11)。盖上保鲜膜静置10分钟。玫瑰酱也取12份,每份一茶匙(图12)。
6、将两端往中间压到一块(图13),然后压扁擀成直径8厘米的圆饼。放上一个玫瑰馅球(图14),合拢包裹住玫瑰馅球(图15),收口朝下,压压扁,放入铺了烤盘纸的烤盘里(图16)。
7、将烤盘放入已预热至375F/190C的烤箱内,烤22分钟左右,表面呈浅金黄即可。



I was very pleased to find this web-site.I wanted to thanks for your time for this wonderful read!! I definitely enjoying every little bit of it and I have you bookmarked to check out new stuff you blog post.
Write more, thats all I have to say. Literally, it seems as though you relied on the video to make your point. You definitely know what youre talking about, why waste your intelligence on just posting videos to your blog when you could be giving us something enlightening to read?
I do not even understand how I finished up here, but I believed this submit used to be good. I do not recognise who you might be but certainly you’re going to a famous blogger should you aren’t already 😉 Cheers!
I’ve been browsing online more than 3 hours these days, yet I by no means found any interesting article like yours. It’s beautiful value enough for me. Personally, if all web owners and bloggers made excellent content material as you did, the net will probably be a lot more helpful than ever before.